Under the Gum Leaves
Kaisercraft


Hello all!

I'm here today to share my latest creation for

Kaisercraft

using the gorgeous new 'Under the Gum Leaves' collection.


This is actually a christmas collection, 
but I was determined to use it for another purpose.

I have torn and distressed pieces of the patterned papers,
and then layered them.


I have added pieces of burlap into my layers, along with fussy cut florals and foliage.

I have built clusters on the corners of my photos,
using fussy cut elements, layered iwth some of the collectables.


I have added in some word stickers and a curio. 


When you look close up, you can see the christmas theme to the script paper, 
but that's the only hint of christmas.


I quite like this layout and it's non-christmasness hahaha. 


You can find the full instructions for this layout HERE

Until next time!

Lisa xoxo

'Tracy Scott Cards'
Scrap Matrix


Hello all! 
I am here today to share some Tracy Scott lovin' with you.

I have been playing with some awesome stamps designed by, 
our star of the month, Tracy Scott!

So here is the challenge


This is what I came up with :)


I really wanted to feature those awesome stamps on my cards,
so I first started working on the backgrounds.

For my first card, I have used my 'Ranger Blending Tool' and
'Distress Ink' in 'Picked Raspberry'
to blend a circle into the centre of my card. 


(Please excuse the quality of the first couple of photos. 
I had my camera on the wrong setting!)

I have then used 'Distress Ink' in 'Dusty Concord',
to blend the outside of the circle, overlapping them slightly.
I kept alternating colours until I was happy with how much they were blending. 


I have then used the same method for my second card, 
but using 'Distress Ink' in 'Shabby Shutters' for the centre.
For the outside I have used 'Distress Ink' in 'Peacock Feathers'


I have then used a variety of stamps to randomly stamp,
 in opposite corners of my cards. 

I have used the '7 Dots Studio Hazy Days'
and '7 Dots Studio Paint Chips' Clear Stamp Sets, 
with my 'Ranger Archival - Black'
for that bit of grunge ;)


I have also used my 'Art by Marlene Storms Don't Last' 
and 'AALL & Create #3' Stamp Sets.


Next I have stamped out my feature images for my cards using the
'ETS02 Stamp Set by Paper Artsy and Tracy Scott'


in the following 'Distress Inks':
'Mustard Seed', 'Broken China', 'Mowed Lawn', 
'Picked Raspberry' and 'Wilted Violet'.

I have then fussy cut them out to layer onto my cards. 


I have adhered them to my cards, 
layering them and using foam tape for dimension on some of them.


I have also used some 'TH Ideology Rub-ons Numbers',


in the corners of my cards, and I have also used the 'Life Quotes' one for my words, 
on white cardstock. 
 I then cut them out and adhered to my cards with foam tape. 


I love the bright whimsy feel to these cards. 


For some reason I felt that these had to be done in bright vibrant colours. 


I think the combination of blue and green is my favourite!


But I'm still loving this colour combo too!


I hope that you like what I have created!
I had a lot of fun playing along with this month's challenge. 
Tracy's bold stylish designs are fabulous to work with.

Until next time!

Lisa


Scrap Matrix Products used:

Tracy Scott ETS02 Stamp Set
'Picked Raspberry'
'Dusty Concord'
'Shabby Shutters'
'Peacock Feathers'
'Mustard Seed'
'Broken China'
'Mowed Lawn'
'Wilted Voilet'
Tim Holtz Ideology Rub ons 

'Tranquil Moments'
2Crafty Chipboard


Hello all!
I am here today to share some inspiration with you.
I have created a layout,
 using some of the gorgeous chipboard designs available from

'Tranquil Moments'


2Crafty Products used:


For this layout I have used watercolours on my base page, 
in colours to match my photo.


I have used some of the 'Fluer de Lis ATC',
which gives you two sizes to use.

I have finished them in a matt black, 
and scattered a few across my page.


I love the contrast of the black chipboard with these colours.


I have also used one of the 'Mixed Fine Border Set',
that I have also finished in matt black. 

I fell for the simplicity and beauty of this border. 
Perfect for my page. 


To finish I have used the 'Tranquil Moments' title.
That's exactly what this moment I took the photo was. 

This has also been finished in matt black. 


I'm really happy with how this layout turned out. 
Not exactly how I first pictured it, but I am loving the final result.

I hope that you like what I have created.

Until next time!

Lisa 

Travel Journal
7 Dots Studio


Hello all!
Today I have a Travel Journal to share with you.
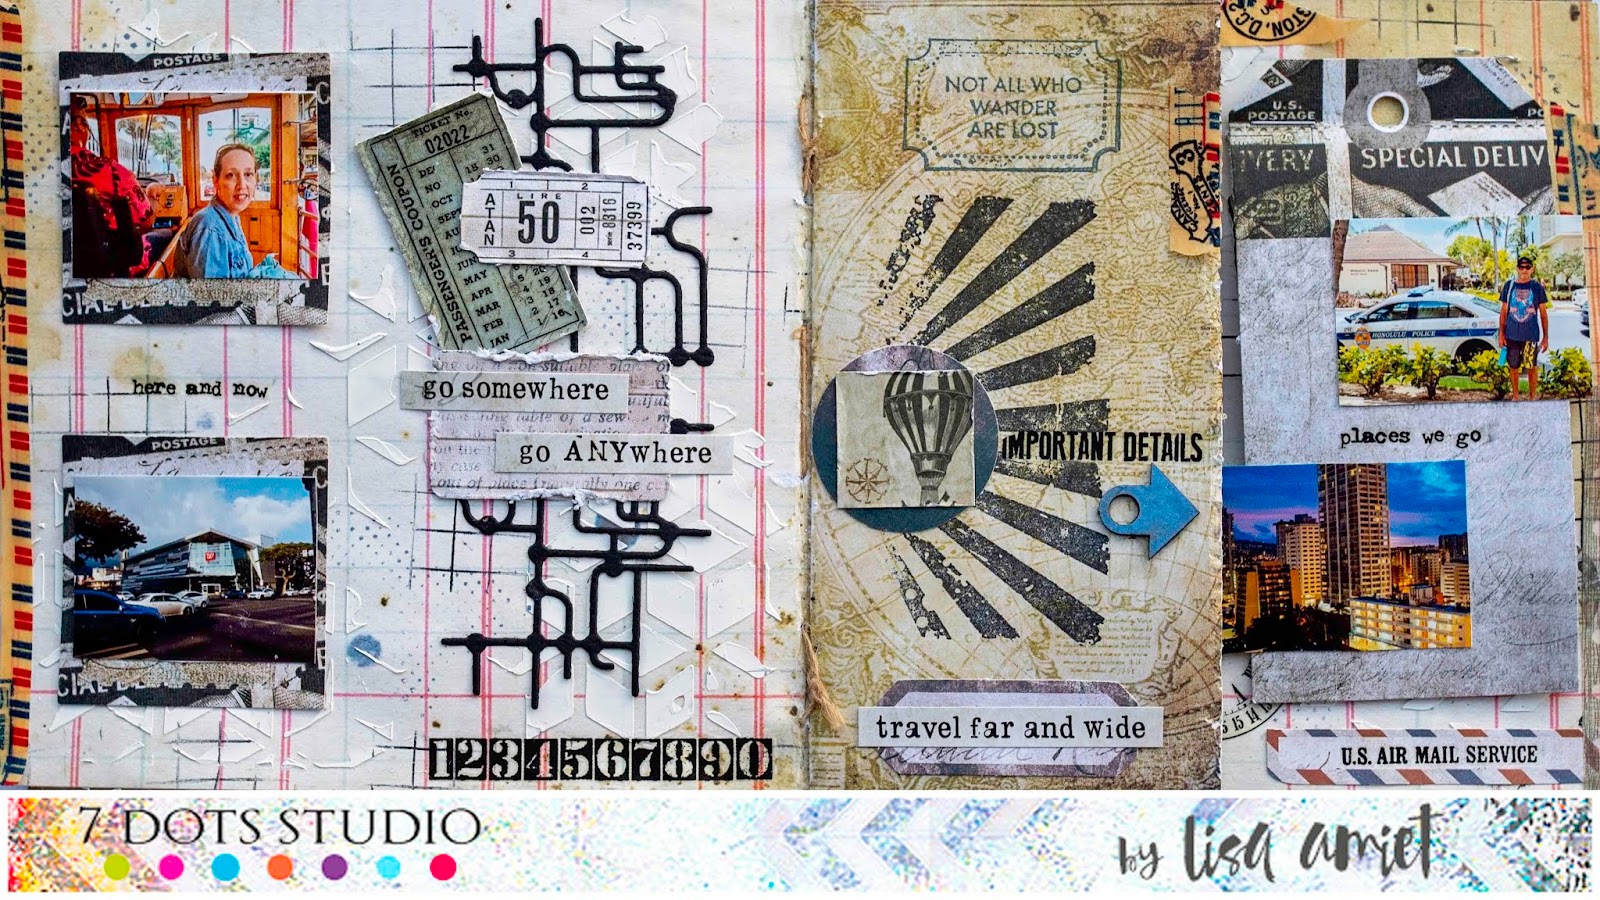
Last year we were lucky enough to have a holiday in Hawaii.
I have put this together using details, 
photos and a little memorabilia from our trip


I have used quite a mix of papers and collections from 
I have also used some of my awesome 


There are quite a lot of pages, flip up, flip out, hidden areas in this book.
I have some daily adventure sheets that I filled out with details of our trip. 
The page then turns out to reveal some more photos,
 and some baggage stickers on the reverse side. 


Some airmail washiest tape helps hold it all together, while using the same theme. 
Under the daily notes there is another page that flips out.


It reveals some more photos and notes. I am in love with this 
chipboard arrow <3 3="" p="">


Then we have the opposite page, which has another photo, and some details.
I have also used a mini filmstrip chipboard piece. 


Then we turn the page to some more photos,
a bit of a subway system and tickets happening. 
The centre is made from half pages.


It opens to some notes about the day and what we got up to. 
The notebook paper was perfect for these pages.


Turn the page and we have a pocket for memorabilia,
I have a Walmart receipt, as I had to have a wander around there!


Some more chipboard pieces from 2Crafty, along with some more photos. 
The tag flips up to reveal another photo and some journalling.


Some close ups :)


There are some fabulous elements in the Air Mail collection
 that were perfect for my book.


Next we have some more half pages but horizontal rather than vertical. 
Each side flips into the middle.


This side has some journalling on the inside, each page is also a pocket.
Then I have used some tags, and added some photos. 


These tags also flip open to reveal more photos, 
and chipboard pieces.


On the opposite page I have the other half pocket page, 
I have added some tickets from our trip.


This opens to reveal more photos on the inside. 


On the next page, I have more journalling, 
photos and tickets from the Luau we attended :)


But wait there's more! Just a couple more pages, 
we were super busy seeing all the sights lol


Some more journalling.


And a couple more photos and ticket memorabilia to finish.


Phew! Well that's it, all done.

I hope you like it, I loved making this, 
as I didn't want to forget the little details of our trip.

Until next time!

Lisa xoxo